React Practice With GraphQL

website

Hello, and Welcome to my blog!

Recently I have been working through some tutorials from Thinkster.io. In this blog post, I will be reviewing my experience going through the React and Redux tutorial.

I completed the tutorial using the GraphQL API I made. The tutorial uses a REST API, so I had to make lots of changes. The changes made completing the tutorial more challenging, but it also made it more interesting. I am glad I did it.

I used Apollo React Client as the GraphQL client to connect to my API. Overall, I liked Apollo, but since I was also using Redux, it made it a bit difficult at times. Apollo and Redux both due state management, I think for future GraphQL applications, I would probably not use them both at the same time. But for the practice, I am glad I used redux again.

It was fun using React again. My last React project ended in December. Completing this practice project was a great learning experience for me. I became more comfortable with making functional components. I now know when to use functional components over the traditional class component. In my last React project, I didn’t re-use components much. In this project, I got practice re-using a bunch of components.

I also changed up the router, the tutorial used react-router. I changed to Reach-router. The main reason for switching was due to some incompatibility with Apollo if I remember correctly. Overall, I found it works better than the traditional React router. I liked it a lot.

Another cool thing I learned well completing this tutorial was how to make custom Redux middleware. I created a custom middleware to handle setting and clearing the JWT from the browser. It worked amazingly, and it was easy to do. I will link the Git-Hub below if your interested; the code is in the file src/middleware.js.

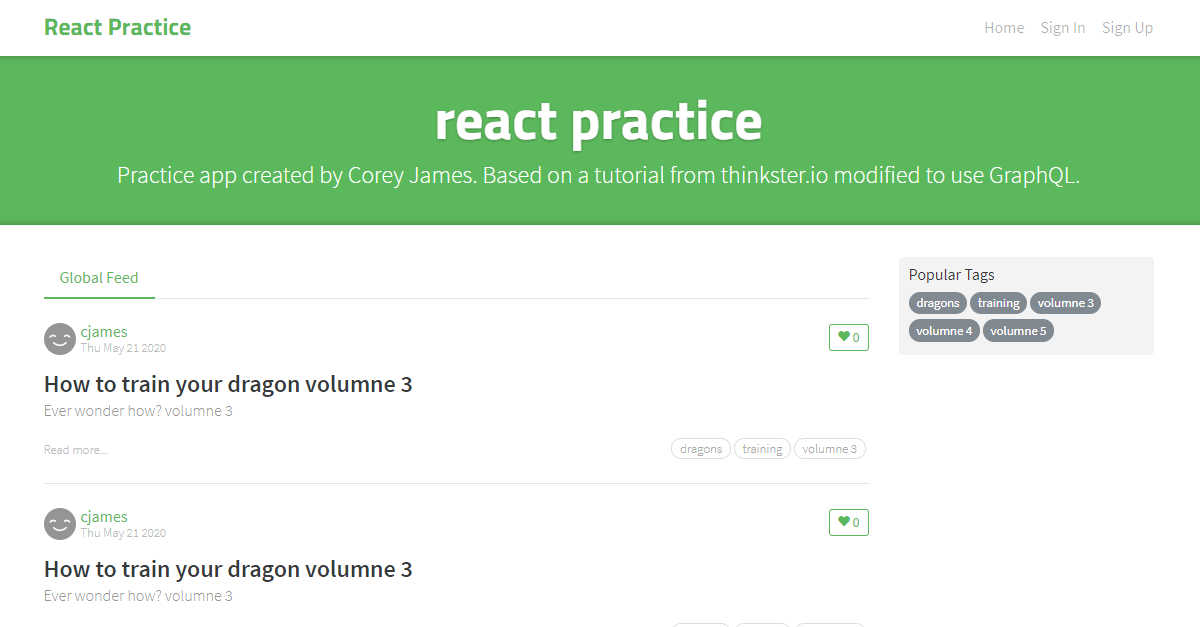
To finish the project, I deployed the GraphQL server on Heroku and used an Amazon S3 bucket to host the web app. Here is the link to the site: http://react.practice.site.s3-website.ca-central-1.amazonaws.com/ 

To conclude, I had a great time doing this project, and I learned a lot. To run the project, I am using a MongoDB server hosted on MongoDB Atlas, GraphQL server hosted on Heroku, and React application hosted on Amazon S3 bucket.

Here is the link to the two Git-Hub repositories for the project.
https://github.com/coreyjjames/REACT-PRACTICE-APP-GRAPHQL
https://github.com/coreyjjames/GRAPHQL-REALWORLD-API-TYPESCRIPT


GraphQL RealWorld API – TypeScript, JWT, MongoDB, Express and Node.js

Hello, Welcome to my blog!

Following up on my most recent post “RealWorld API – TypeScript, JWT, MongoDB, Express and Node.js”. I have modified the REST API I made into a Graph QL API.

What is GraphQL?

GraphQL is a query language for an API. GraphQL allows front-end applications to have control to specify the data received per request. All the data is available to you when you create a request, which means you can mix and match data per request. Drastically cutting down on the number of calls the front-end application has to make to the API.

My experience using GraphQL

I enjoyed using GraphQL, and I think it allows more flexibly than a REST API. There are many different flavours of GraphQL. I used Apollo Server Express. It was a bit of a steep learning curve, but once I built a few queries, I saw how easy to use it was.

Here is a list of some things that I learned about GraphQL. Examples can be found by viewing my code on git-hub.

  • GraphQL is not a database, It replaces your API router. It can be used with any database.
  • GraphQL uses a single POST route. On that POST route, you will make your Querys using the query language inside the HTTP body.
  • Unless specified, GraphQL will look for queries under the Query type.
  • The keyword mutation is used to tell GraphQL to change from looking at the default Query type to the Mutation Type.
  • It is best to practise to put all data fetching queries under the Query type and all data writing queries under the Mutation Type.
  • Postman works great to test your queries.
  • You need to define your schema using the query language GQL.
  • With Apollo authentication and error handling can be done when you create the Apollo server.

Conclusion

I definitely will use GraphQL for my future projects, and I like how flexible it is and that it is available for many different programming languages.

The code for this project can be found on my Git-Hub.
https://github.com/coreyjjames/GRAPHQL-REALWORLD-API-TYPESCRIPT
SPO 600 – Lab 1

Hello,

This post is the start to a new blogging series I will be doing, and it will revolve around the work I am doing for my SPO 600 class at school. SPO 600 is the course code, and the full name is Software Portability and Optimization. The course has a public wiki page if you want to read more available here.

Lab 1 – Code Review

For this lab, I needed to find two opensource community to review how they operate. I found VSCODE and OPENCV.

VSCODE
Visual Studio Code is an open-source project run by Microsoft under the MIT license.

Contributing to VScode
VScode has the following wiki page that explains how you can help here. On the wiki is where you can learn how to file bugs or request features. It seems to be simple you list a few items that they would like you to include, but the formatting of the issue is left up to you. From what I found, the pull request has a link to the issue in them and not any more writing.

Following an Issue request
This seems to be a very active project pull request (or PR) seem to get merged or closed quickly. One thing I notice is that there is not much community PR’s what appears to happen is someone submits an issue then it gets worked on by an employee at Microsoft.

I followed Issue#80352 to see an example of the process, from the moment KamasamaK posted the issue it took about a day for sbatten who I think is a reviewer to reply. Sbatten then added someone who would be able to fix the issue. In the issue, you can see jrieken start working on a solution and then another person mjbvz joined and helped solve the problem and post the PR fixing it.

The total time to fix the issue was about five days.

OPENCV
Opencv is an open-source computer vision library for c++. I took the computer vision course at my school and learned how to use this library. It uses the BSD licence.

Contributing to OPENCV
Similar to VScode, Opencv uses a wiki page to explain how you can contribute to the project. Here is a link to the wiki. On that page, you will find how the developers would like you to send in your help. This project seems to run more on pull request then issues. From what I read on the wiki the developers seem okay with people directly sending pull request versus sending an issue then a pull request when you finish the code, but it is likely a good idea to submit an issue before you start working on it too let the developers know.

Following an Issue request
I followed Issue#15439 to see what the process is to contribute to OpenCV. The first step was for the creation of the issue about the problem, and then you can see a reviewer for OpenCV came and suggested some ideas. In this case, the person who created the issue persuaded fixing the problem and created a pull request with the required changes PR#15440. In this pull request, you can see the conversation between the person creating the pull request and the developer approving it. It took a few days of back and forth fixing the code before the pull request got merged.

The total time to fix the issue was about three days.

Hacktoberfest 2018 – My experience

Hacktoberfest 2018, was a great learning experience for me. I was able to find a great project for this event, that fit my interest’s and ability’s.

Starting this event was a bit challenging, I knew I wanted to work with something with java script. And I also, wanted to work on more front end development. So this helped me narrow down what project to work on, picking a project to work on took some time. After looking through the Hacktoberfest tag on GitHub for a while I came across the Node Chat app that was using node and socket IO to create a chat app. The owner of the project wanted to recreate the test site using react. This peaked my interest, since I was familiar with react, node and socketIO,  so I took on the task of creating this react site for my first pull request for Hacktoberfest 2018.

After my first PR on the Node Chat I asked to continue working on the react app. The owner of the app invited me to be a maintainer for this project. So, for the rest of Hacktoberfest I worked on bugs and features of the react app.

My Hacktoberfest 2018 Pull Requests and Issues

  1. https://github.com/joshghent/NodeChat/issues/11
    https://github.com/joshghent/NodeChat/pull/24
  2. https://github.com/OTRChat/NodeChat/pull/27
  3. https://github.com/OTRChat/NodeChat/pull/28
  4. https://github.com/OTRChat/NodeChat/pull/29
  5. https://github.com/OTRChat/NodeChat/issues/1
    https://github.com/OTRChat/NodeChat/pull/30

Overall, I had a very positive experience in Hacktoberfest 2018. I learned allot about git, especially using branches. I now use branches all the time for whenever I want to test something or work on a issue or feature. And after making 5 PR’s I am much more comfortable with the process.

Now that I know events like Hacktoberfest exist, I am definitely going to keep an eye out for them, in the future.

Hacktoberfest Week One

In my first week of Hacktoberfest I started off without any particular project in mind. I had a few ideas of what I wanted to work on, so I started by searching GitHub for a project. I was looking for something using JavaScript or C++.

After searching for a while I came across a application called NodeChat. In Issue #11 for the NodeChat project the owner asked for someone to move the public site over to React. Having used React, Node.js and Socket.IO I asked in the issue if I could do this.  After, that I started my work on the React app to replace the JQuery version that was previously used in the project.

Making a chat app using React

I started off with some project designing. I needed to figure out how I wanted to organize the react app. Also, I had to go through the existing JQuery file to get a better understanding of what the project is doing.

I decided on the below structure for the app.

    • App
      • This component is the core of the app were the Login Page is called and is currently were all the css and assets are located.
    • LoginPage
      • This component handles new and previous user login’s.  And handles displaying the login page or the chat page.
    • ChatPage
      • This compenent handles all the functionality of the chat.

Currently the flow of the app is as follows the app page displays the Login page. The login page creates a new user or uses a previous user then the Login page decides when to display the Chat page.

A update I think I will do at some point would be to make it so the App page receives props back form the Login page. That would instruct the App page when to display the Chat page. I think this would be a bit cleaner code.

There is still a bunch of stuff that need’s to be finished but at the moment the app is working on a basic level. I am hoping to get most of the bugs fixed as soon as I can.

I think this will be a good project for me over Hacktoberfest and probably after.

Here’s the link to my first PR of Hacktoberfest .

Below is the 2 class definitions for Login Page and Chat Page and I added a small comment about each function. Full Code available here.

class LoginPage extends Component {
    constructor(props) {}
    // Checks if user pressed enter key to submit there message.
    enterKeyPress(e) {}
    // Used to manage the State of the input field on the Login Page.
    setUsernameInput(event) {}
    // Calls checkIfPreviousUser()
    componentDidMount() {}
    // Sets the username 
    setUsername() {}
    // Checks current user is a previous user or calls setUsername() if not.
    checkIfPreviousUser() { }
    // Tell the server that we've had a user join
    userJoin() {}
    // Holds the content's of the Login Page
    displayLogin() {}
    // Render Login Page if not loged in or Chat page if Logged in
    render() {}
}

class ChatPage extends Component {
    constructor(props) {}
    // Calls greetUser() and Lisen's for New Chat messages.
    componentDidMount() {}
    // Displays Greeting message.
    greetUser() {}
    // Checks if user pressed enter key to submit there message.
    enterKeyPress(e) {}
    // Used to manage the State of the input field on the chat app.
    setChatInput(event) {}
    // Send's the message to the server.
    sendMessage() {}
    // Recieve's the chat messages from the server.
    addChatMessage(data) {}
    // Used to handle images(not tested).
    parseMessageText(inputString) {}
    // Used to handle images(not tested).
    imageFile(filetype) {}
    // Used to handle images(not tested).
    getFileType(inputString) {}
    // Used to handle images(not tested)..
    imageLink(inputString) {}
    // Used automatically scroll the page.
    scrollToBottom() {}
    // Render page content.
    render() {}
}